
attic, part 10: finishing up
06.05 - 07.05 the home stretch. not.
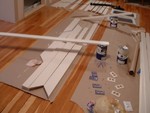 click to see the full photo galleryBy the time we got to the final details -- installing the lights, putting up the trim, attaching the switchplates -- it seemed as if we were emerging out of a very dark tunnel. After everything we'd been through -- the months of drywall installation, the mudding and sanding that took seemingly forever, and all that paneling to be custom cut and nailed up -- the final details seemed like a snap. We figured it'd take us a weekend to wrap things up. Maybe a day longer. Tops.
Not.
Finish work, for whatever reason, takes. For. Ever. There are so many little details in so many different directions that it's hard to keep track of everything. It's rather like herding chickens, really. With the other phases, everything to be done was done in big chunks, either literally or figuratively, so it was very concrete in our minds what needed to be done at any given time. That didn't make it any less frustrating, just less difficult to quantify. Not to mention that all those seemingly incidental details we'd "figure out later" were now ready to be figured out. Or that dozens of adjustments and changes to our original plans we'd made months before trickled down to these details, changing what we'd originally intended for them when we first started the project.
Take, for instance, the lighting. Our attic has a couple of lighting issues, not the least of which is that the back third of the room has no natural daylight, the two main windows being blocked either by the chimney column or the dormer corner. Then there's the room height, which, at seven feet, seriously limits what kind and style of lighting you can put in. When we first wired the room way back in the beginning, we'd originally planned on a kind of adjustable wire track-lighting system that you can bend to whatever shape you like and that had three or four different kinds of light fixture options you could mix-and-match. It also allowed you to adjust how low the lights hung down into the room, thereby preventing taller people (like Sal) from whacking themselves in the melon. Finally, the system had five lights on each track, which would allow us to flood the room with light. We planned two tracks in the main two thirds of the room with coordinating light fixtures in the dormer and at the top and bottom of the stairs. Cool, right?
Er, no. Thankfully, we didn't purchase the lighting in the beginning even though we knew what we wanted. When the time came, we realized that the kit we'd planned on only came with three lights and you had to buy a package of two separately to complete the track. By the time you did all of that (twice, since we'd planned for two kits), the price we'd originally planned had tripled, and that was without the three other single fixtures we needed for the rest of the room. No amount of refiguring our budget could absorb all that cost, especially since we'd blown a good deal of our cushion on the unexpected doubling of the insulation cost. Back to the drawing board.
We spent literally hours online and off trying to find fixtures that would meet all of our requirements: low-clearance, putting out lots of light, at an individual cost that didn't require a kidney as collateral since we had to buy five of them. They also needed to be enclosed, because I really hate all the little bug carcasses that accumulate in open fixtures.
O h, and one other requirement. See, the vast, vast majority of lighting we looked at was some variation on this:
Different finishes of glass or metal, maybe, different depths or circumference of the bowl, perhaps, but generally, they were a variation on this theme. And that's fine and all, except whenever I see a light like this, all I can think of is what it looks like. (Oh, like I'm the first.)
I guess any bowl-shaped item is going to have a vague resemblance, but the little finial thingie at the bottom? You can't tell me that isn't an inside joke at the design departments of lighting companies. They're breast-lights, people! Breast-lights! How can I take my lighting seriously when I think it might need a little underwire support? I mean, I'm a progressive sort of girl and have no objection to the human form or any part of it. But if, whenever I flip the switch, I think "breast-lights, breast-lights, breast-lights"? That's just not going to work.
As I said, nearly all the lights we looked at had this problem. Which isn't to say there don't exist lights that don't have that problem, they just don't exist in our price range, were the wrong color/style, or were flat-out fugly. Ultimately, though, it turned out quite well. We happened upon some simple but pretty single Italian fixtures with completely enclosed alabaster shades. Even better, they were a discontinued item and were seriously marked down; we got all five lights we needed for the price of just one of the tracks we'd originally planned. We were a little afraid the two single fixtures in place of five-light tracks would make the room very dim in the back section, but that also turned out not to be a problem since each of the single fixtures holds two bulbs. Best of all, the shades were a more unusual, flattened shape that didn't look like a bowl, nor did they have little finial thingies, therefore, no breast-lights.
Of course, once they were installed, I happened to look up at them while sitting on the floor (painting trim) and was suddenly struck by their remarkable resemblance to a whole different part of the anatomy. At my sudden burst into uncontrollable laughter, a friend (who was helping with the trim), looked upon me quizzically and when I could finally speak, I explained to her the whole quest for the Non-Breast-Resembling-Light-Fixtures, then pointed up to the fixtures we'd chosen. At which point she noticed the same thing I did: penis-lights!
Sigh.
Other details didn't end quite so easily. We'd purchased all the switchplates and outlet covers when we bought all the electrical items way back at the beginning, but somewhere during the year and moving things between the attic and the basement, misplaced the bag with most of the covers. (Actually, I'm the only one who swears that we bought all of those plates and that they've subsequently been lost; Sal, Dad, and Malinda -- who were there when we bought the stuff -- swear that we didn't.) In the grand scheme of things, not a big deal since we bought the most basic type of plates (because we were painting them to match the walls), but it still irks me that when we clean the basement this winter, I know we're going to stumble across a bag full of 20+ covers which we'll have no use for.
The covers themselves became their own little lesson in frustration, since they all had to be roughed up to take the paint, then painted with multiple coats, and the fronts of the screws had to be painted, too, without gumming them up. I sprayed them all with a couple of coats of lacquer, as well, to help them stand up to daily use. And all of that also had to be done (very carefully!) to the switches and outlets themselves. (If you're going to do this, be sure to mask off everything but the front of the switch/outlet to prevent the paint from getting on the electrical parts. Also, spray the lacquer at an angle so you don't spray directly into the holes in the switch/outlet.)
When it came time to install them, we found that several of the outlet boxes weren't far enough forward in the wall once the drywall was installed (even though we used the little plastic tabs that are supposed to prevent this), which meant some crazy-making finagling of the boxes and electrical components inside the boxes. And, as if that weren't quite enough to put a few gray hairs on our headss, we discovered almost all of the switch/outlet holes were juuuust slightly off-center and/or too big so there was a gap in the wall once the plates were on. Grrr. Off came the plates, then rounds with the painter's caulk, patiently layering it up and smoothing it out so it wouldn't be noticeable, waiting between every application for it to set, then painting it up with whichever of three colors was needed to camouflage it with the rest of the wall.
And then there was the trim. We'd laid out all of the baseboard trim and painted it when we were painting the window trim and the rest of the room, so at least we didn't have a lot of that to deal with.
Unfortunately, our plan for the closet doors (all five of them), had changed fifty bazillion times during the course of the year, along with how the doorways were to be trimmed out. We finally settled on traditional-style hinged doors (that have to be custom-made and thus, have yet to be finished), which meant traditional trim for the doorways. Which also meant the baseboards couldn't be put up until the door trim was up and since we hadn't originally planned for visible door trim (our first idea was modified rolling barn doors with the big wheel hardware -- it would've totally rocked, except it would've cost about $200 for each of five doors because the hardware was so expensive, and was therefore scrapped). Again, grrr. So it was another trip to the Depot for what was decided to be very clean, simple trim of 1"x4" in a lintel configuration, followed by custom cuts for all five doors (every damn one of them is a different dimension. of course they are.), and then painting it all (primer and two coats), and then installing (which took some finagling of its own -- did I mention the doorways are, uh, unique?). Finally -- finally! -- the baseboards could go up. I thought that would take longer but Sal did it in an afternoon; it was all cut and installed by the time I got home from work. That was thanks mainly to the pneumatic finish-nailer we'd picked up at an estate auction a few years ago (along with the little air compressor). I then went back over all the little nail holes, filled them in with putty, smoothed the putty with a swipe or two of sandpaper, and then touched up the holes and joints to make it all look seamless.
Finish it we did, though -- well, as long as you don't count the banisters. Or the closet lights. Or the closet doors. And we don't, because hellooo, ready to move in -- less than 48 hours later, we spent our first night up there in our very own bed. Technically.