
attic, part 8: laying vinyl tiles
04.05 peel and stick tiles: proof of a benevolent deity
 click to see the full photo galleryWe built our eave closets from scratch, which means up to this point, the floor surface was just the plywood subfloor.
Aside from functioning as our bedroom closets, the majority of the space in the closets will be used for storage (holiday decorations, childhood memories, etc.) so they didn't need anything fancy or complicated. The choice of vinyl tiles was a no-brainer: easy to install, easy to maintain, and best of all, cheap!
We chose the most basic, inexpensive design they had, which also coordinated nicely with the paint color in the closets. Not the most popular design, judging from the layers of dust on the boxes, but we figured eh, who cares, right? Alarm bells should be ringing in your head right now.
The prep work is pretty basic and quick, which is another reason to love vinyl tiles because as I may or may not have mentioned before, not a fan of the prep work. Fill in the biggest holes in the floor with wood putty, let it dry, vacuum and wash the floor really well (this part sucked because we had to do it on our hands and knees since the ceiling's too low to get a broom and floor mop in there), let that dry, then apply the sealer/ finish stuff that you buy with the tile. It comes in this little rinky-dink 20 oz. bottle, so we weren't sure at first we had the right stuff and the big box home improvement person was chronically unhelpful, as usual. But it said right there on the bottle it was enough for 300 sq.ft., more than the area we were covering.
Turns out, we used maybe half of the bottle. I don't know what we were expecting, but it basically comes out the color and consistency of Pine-Sol and just soaks into the wood about like you'd expect Pine-Sol would. You just pour it out and spread it around evenly (we used paint pads), working quickly because it dries/soaks fast. The stuff stinks, but we were done in about half an hour so it's not that bad.
We let that set overnight, then started early the next morning by centering the first tile in the opening of the closet and building up a pyramid as we worked our way to the corners. Some of the tiles had a misprint of the pattern (one box was almost all irregulars) so we had to be on the lookout for that, though some of them could be used for cut pieces along the wall edge, depending where the screwed-up pattern fell. Cutting is easy, you just need a pencil, a straightedge, and a utility knife.
We did run into a little trouble with some of the boxes of tiles, due, we think, to their age. They looked fine, but the adhesive on the back was sticker than usual and seemed to have melted or something. It got onto everything, covering your hands until you felt like you'd rubbed them with sap, and making things progressively worse. It was like that scene in Christmas Vacation where Clark and Ellen are in bed after their tree-cutting adventure and the magazine pages keep sticking to their fingers.
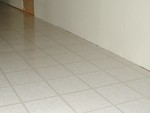
We managed to get all three floors done in a day and a half, especially good considering that we had to cut almost half the tiles to fit. Anyway, this was a very easy and affordable project and I'd recommend it to any first-time DIYers who're looking to get their feet wet with home improvement, or even ones like us who need a little morale boost of actually finishing a project in a matter of hours instead of months.